Did you know that belay can be defined as a noun as well as a verb? I learned something new when I did my research to write this article. It is so wonderful to always be learning. In rock climbing, I usually refer to belay as a verb.
In this article, we will be discussing briefly “what is a belay” and specific information on how to belay someone on top-rope for an indoor gym. There are multiple ways of belaying. Use this article as a reference to prepare you for an actual lesson at a climbing gym. Before you can climb at any gym, you are required to take a belay lesson at their gym. If you know how to belay, you will be asked to demonstrate.
According to dictionary.com, belay (as a noun for mountain climbing) is “a rock, bush, or other object sturdy enough for a running rope to be passed around it to secure a hold”. It’s like an anchor. Belay (as a verb for mountain climbing) is “to secure a person by attaching to one end of a rope.”
When you are belaying someone, you are considered to be a belayer. The belayer is the anchor for the climber and plays an important role in sport climbing. He or she handles the rope while the climber climbs up a route. The belayer catches the climber when fall or lower the climber down to the ground when the climber completes climbing a route.
As a rule of thumb when a climber is heavier than the belayer, consider tying the belayer into a ground anchor such as a 50 to 100-pound sandbag. A sandbag is generally available at climbing gyms. If you do not see one, inquire about it.
Gear for a belayer
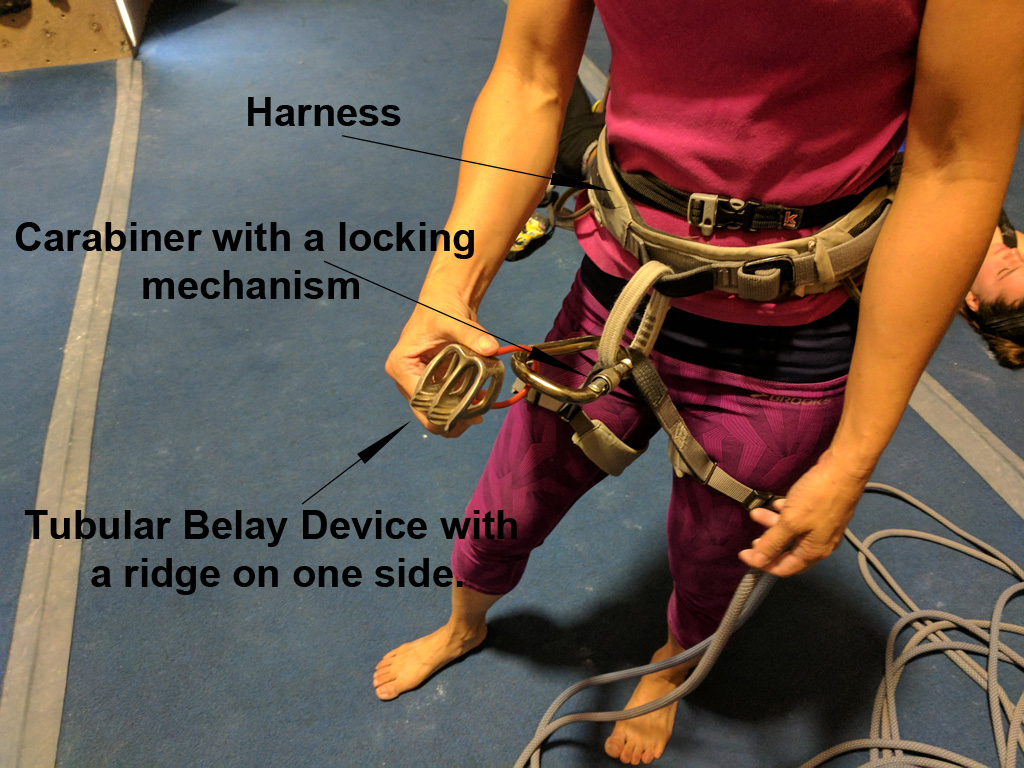
You will need a belay device, a carabiner with a locking mechanism, and a harness. The hardware can be rented at a climbing gym. The rope for top roping is usually provided by the gym. For rock climbing gear in general,
please refer to the article on gears (www.rockclimbingforwomen.com/gear) as well as the following articles:
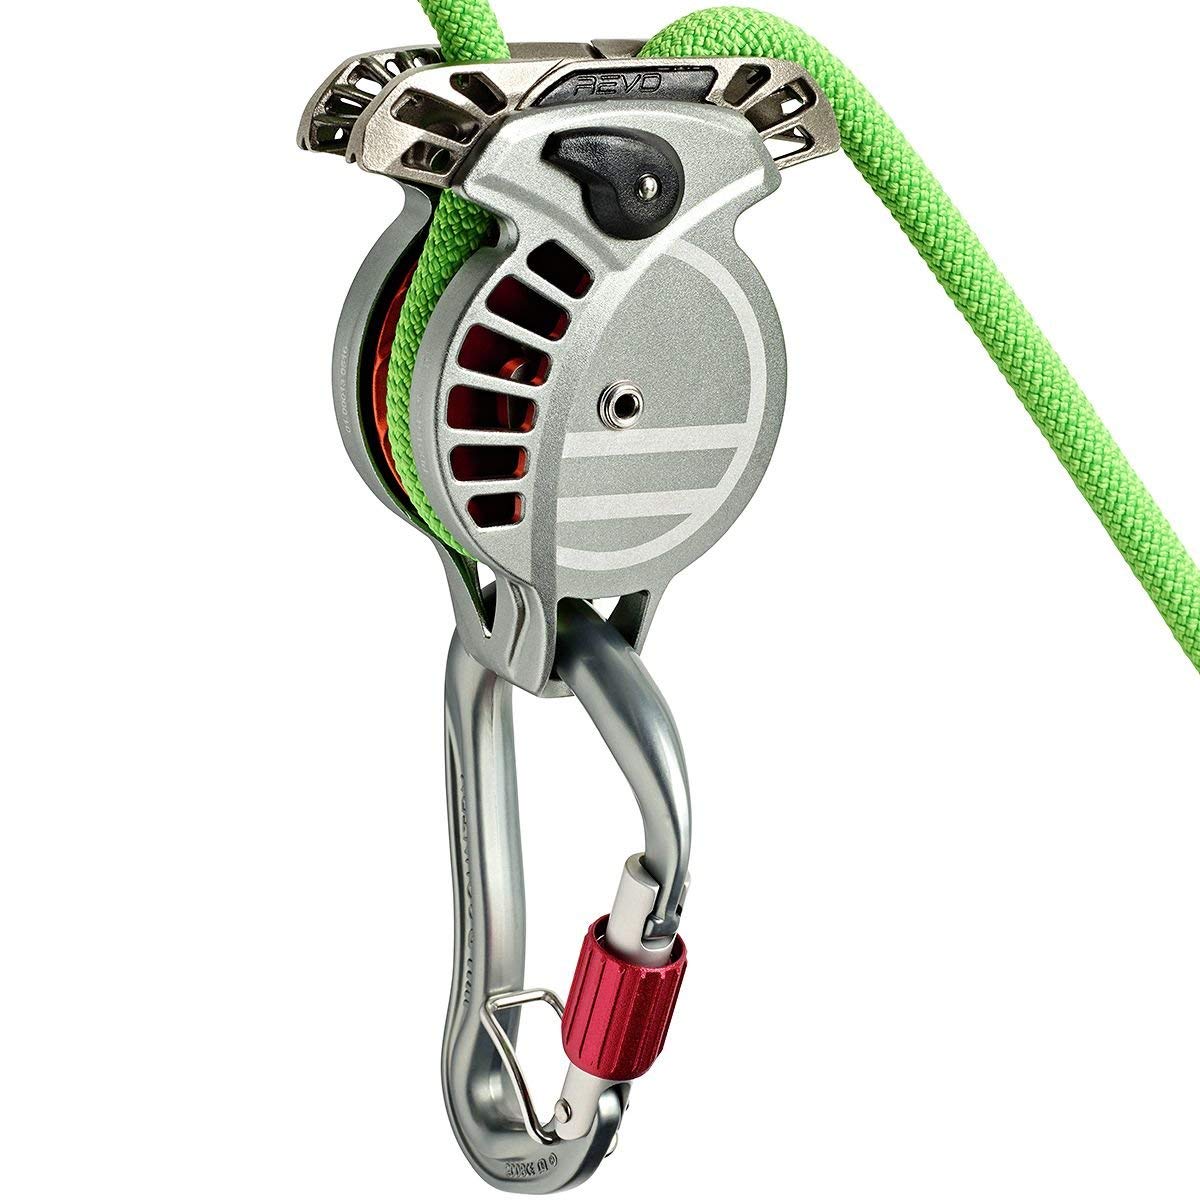
There are different types of belay devices for indoor as well as outdoor climbing. Learn them when possible and use a belay device that is most comfortable for you. For indoor top-rope climbing and simplicity, we will go over how to belay with a tubular belay device. You can use this belay device indoor as well as outdoor. Here are a few reviews of different belay devices for your research:
Black Diamand Atc Pilot Review
Petzl Grigri Belay Device Review
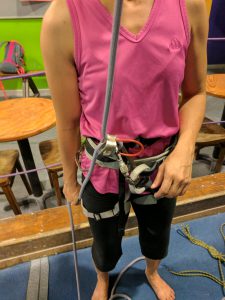
Setup the belayer
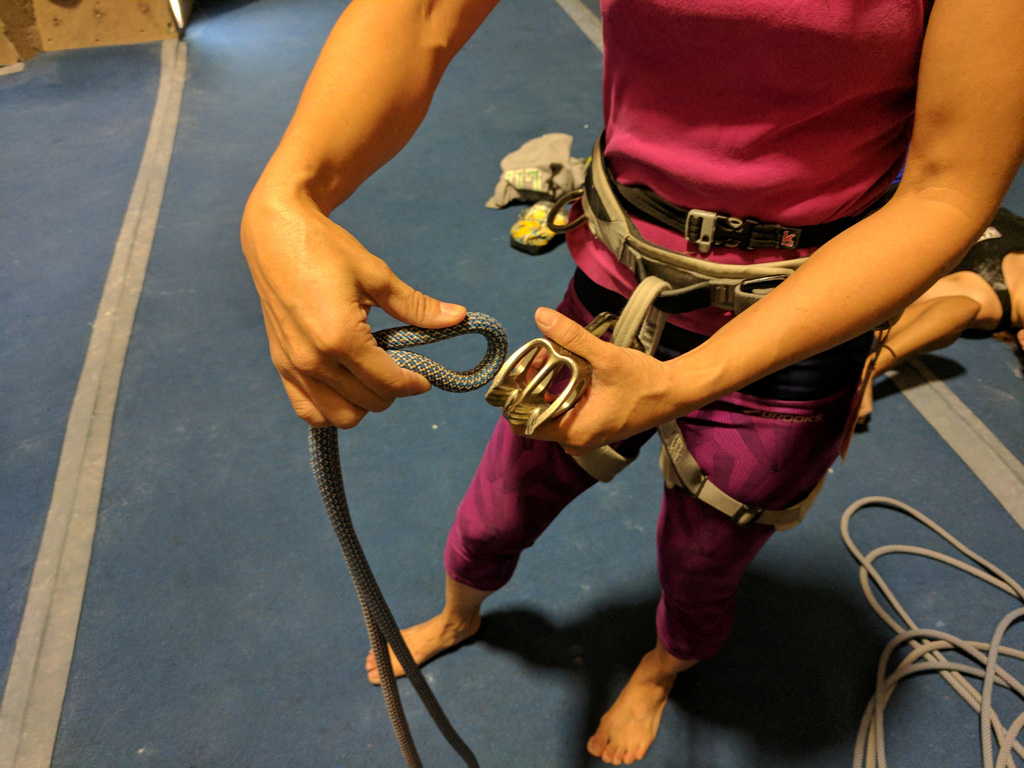
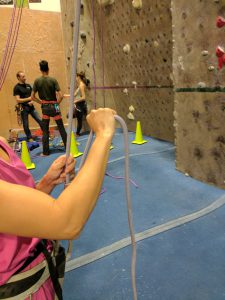
Attach the carabiner and a belay device through the main loop of the harness you are wearing. Find the rope close to the end, bend the rope, and push it through one side of the belay device. If you are right-handed, you would push it through the right side as pictured. If you are left-handed, you would push it through the left side of the belay device.

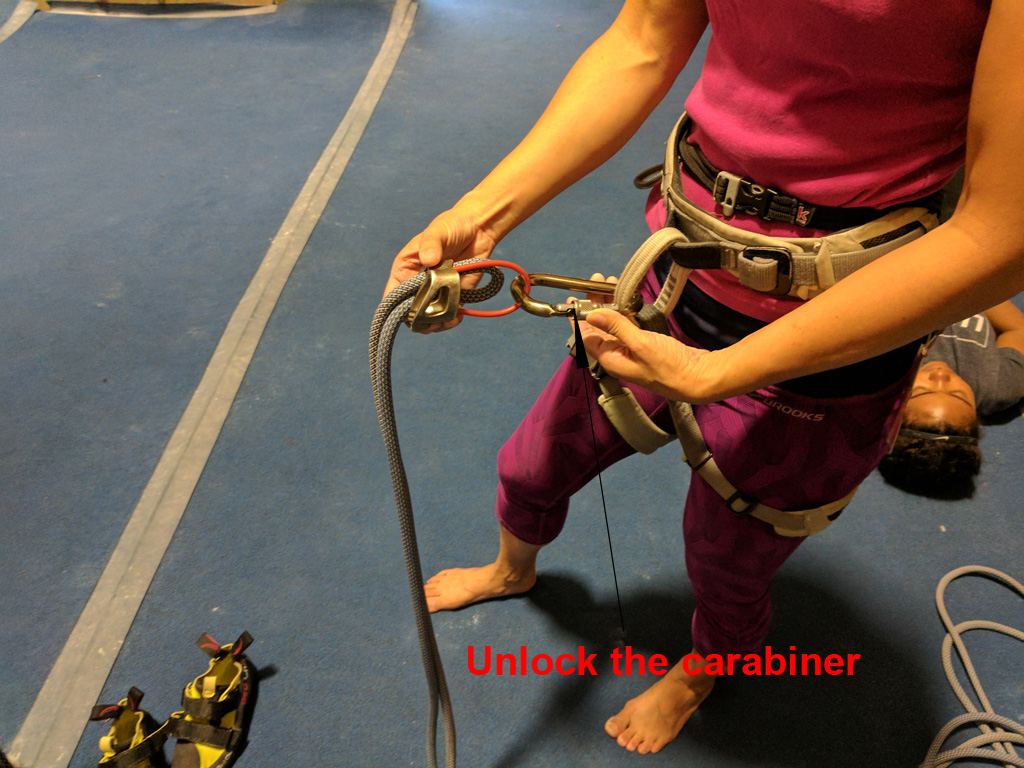
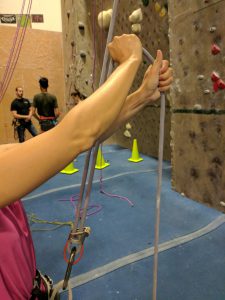
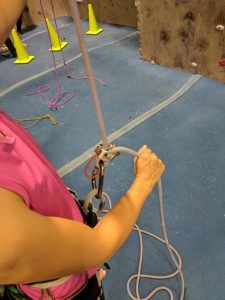
Unlock and open the carabiner. Loop the rope that you just push through and line it up next to the belay device.
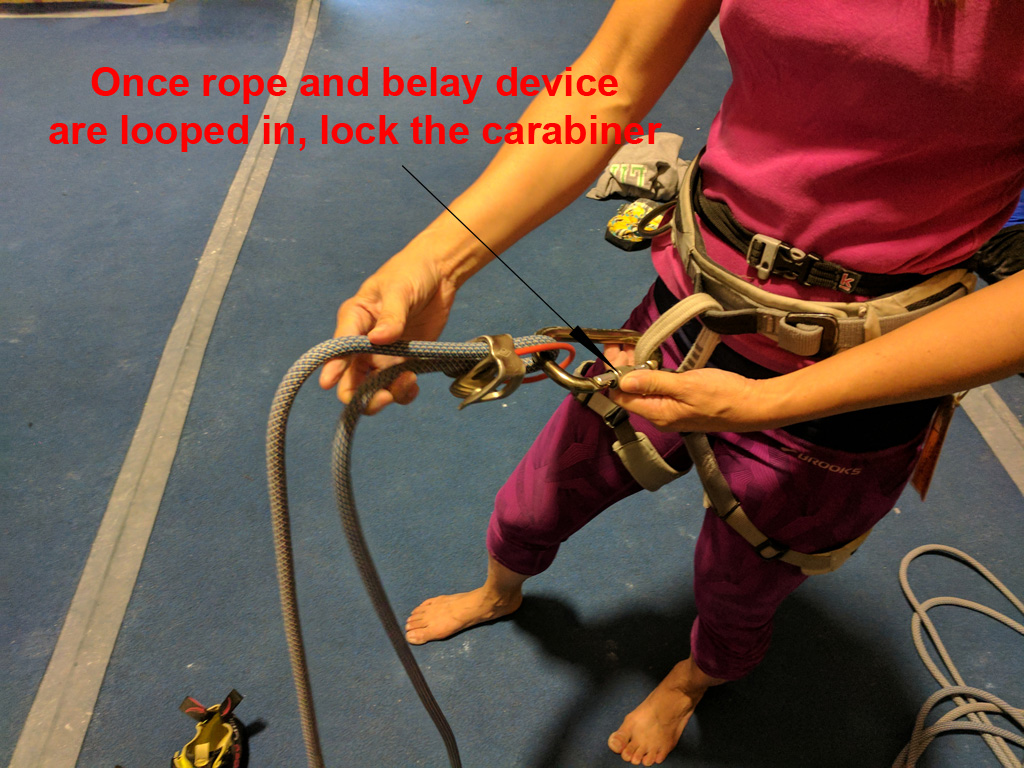
Once the rope and the belay device are looped in, lock the carabiner.
The bottom rope which is more closer to the end of the rope should be your break.
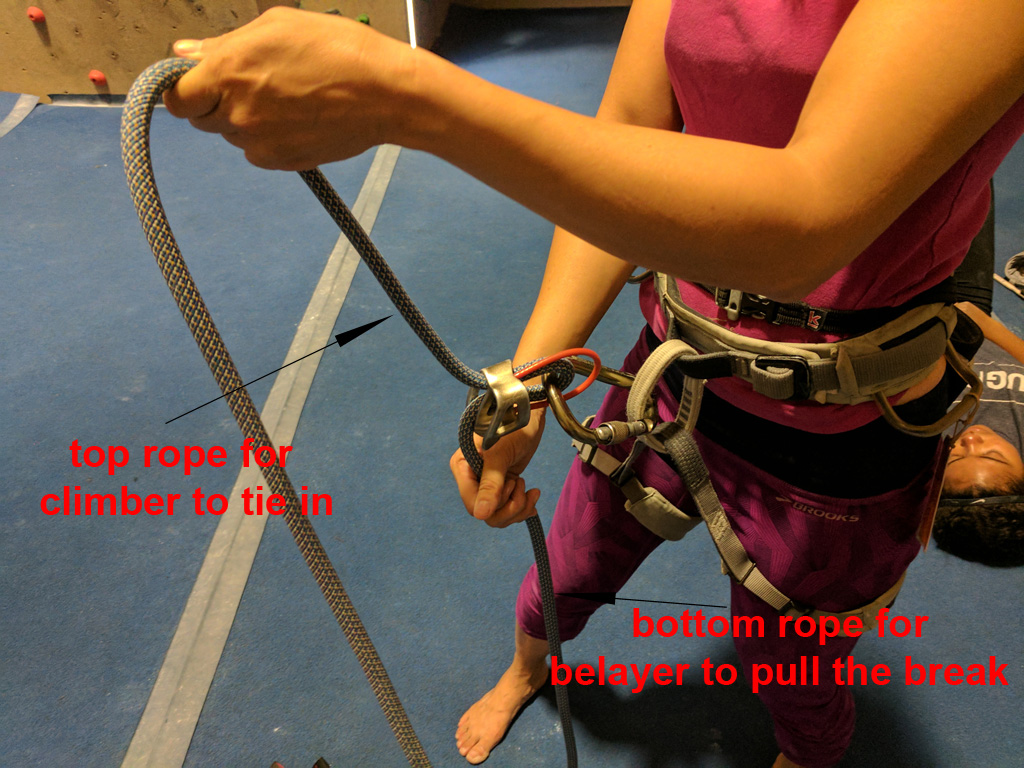
The top rope is the rope that will be connected to the climber where the climber would tie in his/her harness to the figure 8 knot – see article on how to tie into the figure 8 knot.
Safety Check the belayer and the climber
The climber should be checking the belayer and the belayer should be checking the climber. Make a habit of always checking each other. This will prevent any careless mistakes. It is especially a good habit to establish for climbing outdoor as well. Here are the steps for each safety checks:

The Belayer check list
- Is the rope loop into the belay device
- Are the belay device and rope attached to the carabiner?
- Is the carabiner locked?
- Is the carabiner connected to the main loop of the belayer’s harness?
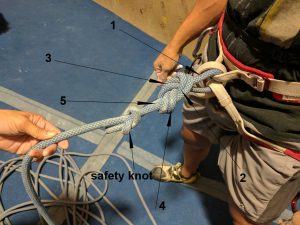
The Climber check list (see tie-in figure 8 knot for reference)
- Check for 5 sets of two ropes next to each other
- Safety knot – when there is a long tail at the end, tie off using a double fisherman’s
knot as a safety knot. In this case, we have only enough for one loop instead of two loops to make the double fisherman’s knot. - Make sure that the rope is loop through the climber’s harness (your own harness – 2 loops or the rental harness – 1 loop)
- Finally, tuck in all loose articles dangling from the climber’s harness.
Communication between the belayer and the climber
There are common terminologies that the climber and belayer use among themselves to communicate their need while they are climbing. It is important that the climber and belayer using the same words so there is no missed communication. These are a short one two words commands. They are quick and to the point. You need to be loud so that the climber can hear you and vice versa. Here are some terminologies:
- Climber: “On belay” — are you ready?
- Belayer: “Belay on” — I am ready.
- Climber: “Climbing” — I am climbing.
- Belayer: “Climb on” — I am ready to catch you.
- Climber: “Take” or “Tension” — bring in the extra rope and make it tight. I want to rest a little bit while hanging on the rope.
- Belayer: “Got you.” — I am pulling in the extra rope and making it tight.
- Climber: “Slack” — Give me more rope.
- Belayer: Slide out more rope for climber and pause for climber next command.
- Climber: “Ready to lower.” — I am ready to be down.
- Belayer: “Lowering” — I am lowering you to the ground
- Climber: “Off belay” — I am on the ground.
- Belayer: “Belay off” — I am done belaying.
- Climber: “Falling” — I am about to fall or falling, now
- Belayer: Be alert and ready to put on the brake when necessary and be prepared to catch a fall.
Techniques for belaying
When top rope belaying for an indoor gym, most of your time will be taking in the slack as the climber is climbing. Use your dominant hand as the brake hand. I am right-handed so all of my belay pictures are examples of belaying with my right hand.
Always be prepared to catch a fall by braking with your dominant hand.
Braking
I position my right hand at least six inches below the belay device and firmly hold the rope down by my side. The rope is instantly locked in place. I would avoid being too close to the belay device. If the climber falls suddenly and my hand is too close to the belay device, I could get pinched into the belay device and the rope. This could be painful and at the same time put the climber at risk of me dropping the rope.
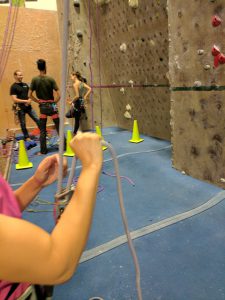
Stance
Your knees are slightly bent and your body is relaxed and alert. Your feet are shoulder-width apart. The dominant hand is ready to brake when necessary and your opposite hand will be the guiding of the rope for the climber.
Belaying
- My brake hand should never let go of the rope during the belay. It is always ready to catch the climber’s fall with a motion pulling the rope down below the belay device.
- To safely tighten the slack or the tension of the rope without letting go of the brake hand:
- I pull the rope up and away from the belay device as high as I can reach without over-extending my arm.
- With the other hand, grab the rope a little higher above my brake hand.
- While the opposite hand is holding up the rope, slide my brake hand down closer to the belay device.
- When the rope is tight while waiting for the climber to continue to climb, I bring my brake hand and the rope down below the belay device.
- Continue and repeat the pull, grab, and slide motion to reduce the slack from the rope until the climber completes the climb.


Lowering or holding the climber
The climber can request “tension” or ” take” to rest for the next move. Reduce any slack in the rope and bring your brake hand and rope down below the belay device. Lean back to hold the climber’s weight and maintain the rope tension. The belayer reply to the climber’s request with “Got You!”
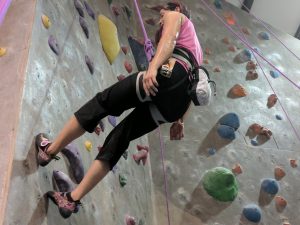
When the climber is ready to be lowered, the climber calls out “Lower me”. The climber lean back into a sitting position and legs can be propped against the wall. The belayer reply “Lowering”.
The belayer brings the guiding hand under the brake hand. With both hands on the rope, slowly feed the rope through the belay device and lower the climber. Keep a constant speed while lowering the climber and pause when there are possible obstacles like other climbers. Continue to lower the climber down to the ground and allow the climber to land safely with two feet firmly on the ground. Once the climber is safely on the ground, the climber calls out “Off Belay” and the belayer replies “Belay Off”.
All the instructions may seem overwhelming for your first time. However, it becomes second nature when you practice it in the gym with your partner. Safety rules all. With safety practices and habits incorporated at all time, your mind will feel confident and enjoy the process of rock climbing.
Climb on my friends. Please feel free to comment below and add anything I may have missed. I love to hear from your perspective. Thank you for your visit.

